
Showing posts with label 1/100 MG Wing Zero Custom. Show all posts
Showing posts with label 1/100 MG Wing Zero Custom. Show all posts
July 10, 2013

March 29, 2013
Wing Zero Custom Review [1/100 MG, 2004]


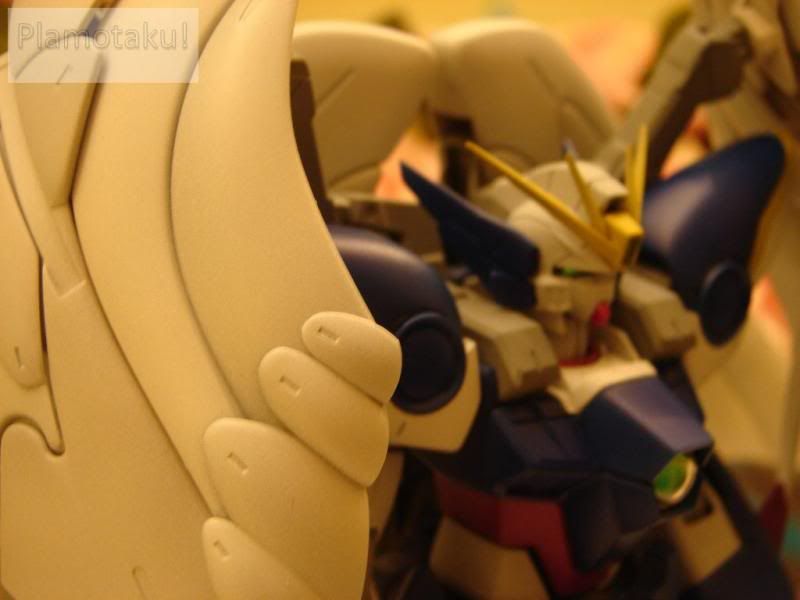

Kit Name: Wing Gundam Zero Custom
Manufacturer: Bandai
Grade: Master Grade
Release: 2004
Price: Abt $40 USD paid
Kit value: Abt $400 USD after labor
Paint Colors:
Testors flat black (shading) [A]
Testors neutral gray (primer) [A]
Testors insignia yellow [A]
Testors insignia red [A]
Testors dark blue [A]
Testors green [E]
[A]= acrylic
[E]= enamel
[L]= lacquer
[S]= shellac
Introduction
I've heard a lot of complaints about this guy. At first I was reluctant to buy the kit but a rrobbert184 review changed that around. I saw his look at the pearl gloss version and decided I would give the kit a try. When my camera arrives you can expect a retrospective review of this kit.
Opening the Box
When you open the box you'll be greeted to a few plates, but you will notice that Zero does not include a full inner frame. This kit was engineered before the rise of 2.0 inner frames. For experienced kit builders like myself, this won't be a problem. For intermediates and beginners, the seam lines and "plasti-cky" feel to the overall finish may leave an unsatisfying taste in the mouth.
No Waterslides
The kit includes foil stickers, dry transfers and stickers. I do not use stickers. No water slides are provided. I would use dry transfers but I am not a guy who decals Wing kits, so they will go in the decal box. For water slides you will have to order 3rd party sheets.
Construction
Despite the work involved, it was a pleasure putting the kit together. The feet have a fair degree of mobility. The legs have a weird mechanism where they fold back for the re-entry mode, making it difficult to align the legs and the knee armor just right. Minor nitpick though. Because of the age of the kit, there was no transfer bar between the upper shin and the lower knee mechanism which is present on modern day XXX-G frame kits. If you've worked with the previous XXX-G frames, Zero will be quite a bit different.
The waist has a fair bit of mobility, but you won't be getting uber crazy angles out of it. Sadly, the arms have about a 90 or so degree bend, and that's all you'll get out of them. This is definitely a problem that needs to be rectified in a 2.0. The legs are fairly articulate, but again can be a little weird to straighten out because of the re-entry mode gimmick.
Your biggest seam line issues will be on the back wings, the buster rifles and the forearms. These can all be rectified using patience, cement and putty. The hands are of the 3-finger, trigger finger split variety and have been notorious at not holding things properly. Sticky tack can rectify the situation quite easily. The rear wings have a section that opens up, revealing more wing detail on the inside.
This kit is also notorious for having wings dropping and falling down due to gravity. Since I painted my kit 100%, the joints have tightened and I have not noticed the wing problems everybody seems to have. As I said to someone recently, if Zero wants to play hardball I have sticky tack. If that fails, I have other steps that can be taken- such as tape (in sparing amounts).
The side wings are complex, but nothing impossible. Dare I say the Wing Gundam's wings [2010, Bandai, Master Grade] were more complex than these. The mold detail is excellent and I am very happy with how the paint came out on them. They will expand out and let you do some really neat poses, though I have not tried that yet. The photo-shoot should come soon when I get some stuff done, such as the feathers still waiting in the shop.
Speaking of. That is a nitpick I have with this kit. I understand the idea of rubber feathers so people can bend them how they please, but I feel they are annoying and they do not hold paint very well.
One other odd point of note is that Zero feels ever so slightly smaller than he should be. I have him next to Epyon here [2011, Bandai, Master Grade] and he feels a bit... short. This may have been done to accommodate the large wing span. This fact has been reiterated by a lot of bloggers and youtubers. It doesn't bother me a whole lot, but to replicate the scale effect, dimensions should be as accurate as possible. Still, the overall look they were going for nailed the head right on.
Display Base
Back in 2004 when this guy came out you couldn't buy action bases. This kit came with its own. It features two angles that allow you to stand the kit aerial and to allow you to do the infamous bunker buster pose. I have not tried that pose yet, but it seems Zero is attached pretty darn well to the base. I plan on attaching the base to a wooden base that I usually attach my Gundams to. The length of the included base matches the inner diameter of the wooden base. Go figure. I'll probably paint it all (both bases) the same color. I don't know whether to go with blue or black. I feel blue may detract from the viewer looking at the kit.
The Finished Product
The finished product is excellent. I have to say- my model building and painting skills have improved so much ever since I switched to an airbrush and got more serious with my hobby. I am laid back and take my time with these kits, but the effort, even if it was boring as hell at times, has been absolutely worth it. Every one of my kits, in my opinion keeps getting better and better. Hell, I'm so happy with this MG that I "may" not buy the 2.0. I'll probably buy the 2.0. If anything, do a vertical build where half the armor is on and half of the model is inner frame. I've always wanted to do a kit like that.
Recommendations
I am going to give this kit a thumbs up. It isn't the crème de la crème anymore, but it is still worth a buy if you are a fan of Gundam Wing or the Zero unit from Endless Waltz. It is one of my favorite gundams, so I couldn't pass it up, even after hearing the negative publicity on it. I guess it's a love it or hate it kind of situation. I was able to deal with the faults, correct them, and my oh my is it an eye magnet when people come in the room.
This is the first draft of the review. Some odds and ends may be added or changed in the future to more accurately portray my thoughts on the kit.
March 28, 2013
1/100 MG Wing Zero Custom Progress Part 10
I'm kind of "blah" with this kit right now. Lot of stuff going through my head. Normal stuff for a 24 year old bachelor. The devil's in the details- there are just so many small nitpicks to take care of in order to get this guy going. I tried flipping the feathers today (without top coat) and the tape underneath ripped it right off. Had to go back and re-primer all the feathers. I'll hold the damn things in my palm if I have to. What is likely going to happen is that I'll finish the kit sans feathers, and slowly get them in line over the course of a day.
Everything is now shadowed. Remaining parts await primer, then paint. I'll have to do four color swaps- white, blue, yellow, and red. I'll start with the lightest and go darker. When those parts dry, assuming nothing gets ripped up around the arm joints, I'll give them 6-12 hours before soft handling and final assembly.
Everything is now shadowed. Remaining parts await primer, then paint. I'll have to do four color swaps- white, blue, yellow, and red. I'll start with the lightest and go darker. When those parts dry, assuming nothing gets ripped up around the arm joints, I'll give them 6-12 hours before soft handling and final assembly.


March 27, 2013
1/100 MG Wing Zero Custom Progress Part 9
Buster rifles are complete. They are BADA** in my opinion. I decided not to go too crazy because the viewer's eye will go torwards the rifles and not the robot. I passed on the foil stickers and painted the camera lenses, including the ones in the forearms. The lenses on the head and v-fin will be painted after the V-fin is painted.
Everything else that needs painting is mounted. The joints are masked. The backsides of the wing extensions will be primed and painted tomorrow. The feathers will be top coated, left to dry for 6 hours then flipped around, gently resting on light tape. The process for the other side will be the same- shade, primer, paint.
I'd like the kit to be done by tomorrow evening, but definitely by Friday.
March 26, 2013
1/100 MG Wing Zero Custom Progress Part 8


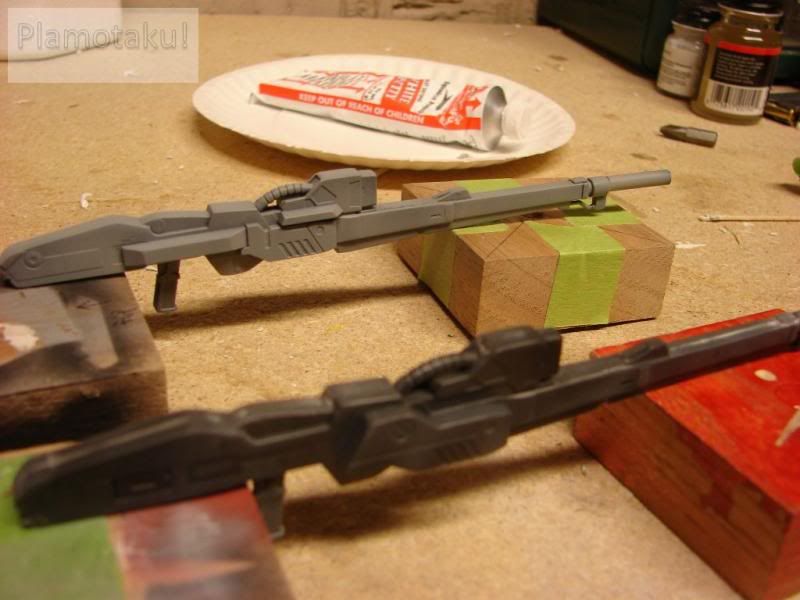
We're slowly making our way around the final 1/4 mile of the track. The majority of the buster rifles were finished today. I spent around 5 hours fixing, filling and sanding those things to make them as perfect as they can be. They await a touch up coat of gun metal and then some detailing.
When that is done I will flat coat them and that sub-section is complete. Tomorrow, the arms must be dealt with. I must flat coat the joints, carefully mask them, and paint white. Then remove the mask 6-12 hours later. The chance of some chipping is fairly good. Not much I can do about that. Then the backs of some wing parts need painting as they can show at certain angles. Then all final parts that are blue, gray, red and yellow will be primed and painted.
Then the eyes need installing. After that it's a good day to let everything settle and cure, then final assembly (with gloves) will begin. The base needs painting. When assembled, the kit will be top coated all over. The buster rifles will be sticky tacked to the hands. The wings will be sticky tacked into their proper holes for added stability.
1/100 MG Wing Zero Custom Progress Part 7
The kit will be done by Friday, March 29, 2013.
Today I've been working on the buster rifles. Filled all the seam lines and sanded everything down. It was a pain. Repaired the barrels with new 5/32" stock. Sanded the barrels down to be the same length. I was able to shade both rifles, but primered only one. When I went to primer rifle #2 the brush jammed. I cleaned it out and I'm taking a break. I'll get back to it later tonight.
The rifles still need the primer step complete, then paint, then detailing, then top coat. I checked the previous batch of white. 2 parts failed inspection. One because I must have missed it (lol) and the second one had spots on the paint job. I will sand it smooth and go over it again to make it match. I have been referencing every piece of white to one of the main wings so that the color hues are in rough agreement. Pics later today.
March 25, 2013
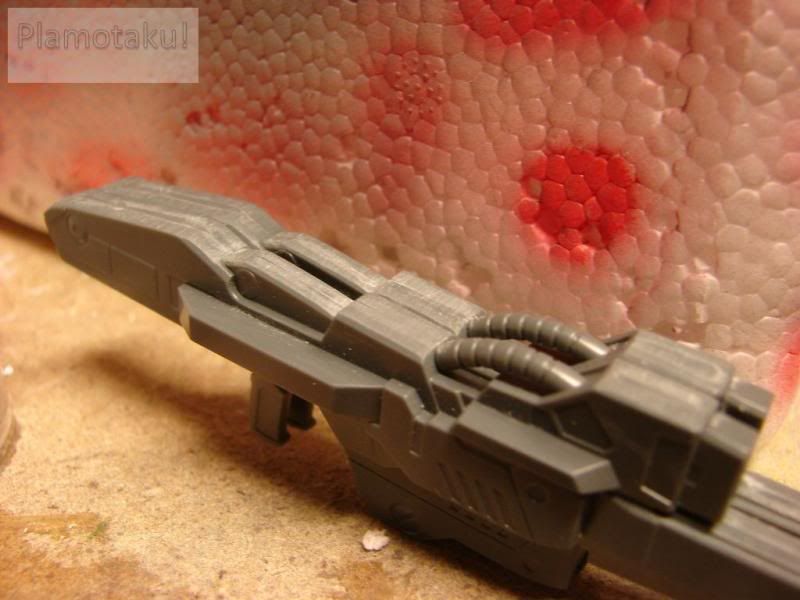


March 24, 2013
1/100 MG Wing Zero Custom Progress Part 5
Some tip dry problems this morning. White
seems to keep clogging up the airbrush. I finished what I could for now.
I'm heading back down in a few moments to give the airbrush a really
good deep clean before trying again. I primered some parts with neutral
gray, and it sprayed no problem.
The head came out really nice though. The arm units... I'm going to have to figure out a way of masking off the joints without ripping the paint up. I think I'll gloss coat the joint areas, let them dry a day or two and then mask them, then paint the white I need to paint. I need to head out later today to the hobby store and find stock for the new buster rifle barrels. I'm very likely to finish the suit itself before the weapons.
The head came out really nice though. The arm units... I'm going to have to figure out a way of masking off the joints without ripping the paint up. I think I'll gloss coat the joint areas, let them dry a day or two and then mask them, then paint the white I need to paint. I need to head out later today to the hobby store and find stock for the new buster rifle barrels. I'm very likely to finish the suit itself before the weapons.
March 23, 2013


March 22, 2013
1/100 MG Wing Zero Custom Progress Part 3
Last bit of white parts shaded and primed. Group of parts fell and a
seam line on the back of a forearm cracked. Had to reglue and it looks
good enough that I won't have to use putty. The individual feathers for
the wings will have to be numbered and primed/shaded individually. There
are very specific feathers that go in very specific locations, and I
don't want to end up mixing them up.
I'm at the end of the tunnel almost with Zero- I'll have to head out tomorrow and get new stock plastic for the barrels. I haven't even putty'd and sanded the buster rifles yet. Then they need cleaning up, shading, priming, painting, and detailing. Like I said- a whole other beast to finish the buster rifles.
Kit is looking good.
March 17, 2013
Plamo- What's Coming Next After Wing Zero Custom
Bonus Blog Content
Then order:
7) RX-178-2 Titans (RG)
8) God Gundam (HG)
9) Guntank (HG)
10) British Chieftan Mk V (Tamiya)
11) Gaplant Hrairoo (HG)
March 16, 2013
1/100 MG Wing Zero Custom Progress (2)
Put up some parts to be painted later today. I shaded then primed them.
Messed up on one of the wing attachments- gonna go back and cover it
again with the next wave of parts.
The rear wings sticking out the backpack came out beautiful. Next time I'm done there I'll take photos.
There are 107 parts/assemblies remaining to be primed and painted. I combine the primer and shading steps. If I double down I can have everything painted and primed within four days.
Then there is the matter of the buster rifles. That is another beast entirely. I broke off the barrel attachments... go figure. I need to head to the hobby store for some top coat, so I will see if they have tubing that will slide over the remainder of the barrels. I would use brass, but plastic by far is easier to sand flat. Then the rifles need to be detailed. And primed. and shaded. and painted.
Jeez I forgot what's there of the inner frame that will be exposed. I'll have to look over photos again but that won't take long at all to paint over the joints. The backpack connector to the wings will need to be painted. All exterior surfaces- should be a fun challenge.
Prime and paint remainder of assemblies- 4 days
Prime, paint, repair buster rifles- 1 day
Paint exposed joints- do during 1 day token
Final assembly- 1 day
Paint base- 1 day
Top coat- do after final assembly (with gloves) (allow to cure, dust free 24 hrs)
________________________________
Estimated time to completion: 3/26/2013
March 15, 2013
1/100 MG Wing Zero Custom Progress
It's a little too subtle for me, but with a SA brush and a 1st attempt I am not complaining. As a roommate once told me: sometimes being conservative is the best route.
I will be painting the rest of the kit with this technique. I had to paint the wing connectors on the two back wings, so I could not mask them off (risk ripping paint off) to paint the back wings tonight. They will look gorgeous when done. To me, anyways.
I've taken a new step in my model building hobby.
The tank is poor old stunt c**k. I use him to test paint application and flow before it touches my project. It has SAVED countless parts from a bad paint job. *laughs*
Finished sanding all white parts with 400 grit paper. Everything else needs to be sanded down with 400 grit paper. Then everything needs sanding with 600 grit paper. Then everything needs to be washed, dried, inspected then primered. I'd like to move on this project because by the end of March I am going to have around 4-5 additional projects in a que.
I tried some shading this morning and I think the results came out fantastic. I used a flat black and very lightly sprayed some on where the panel lines were as well as on the outside of shapes on the surface. It isn't as fine as I'd like it to be (small lines), but for a SA brush it is acceptable. I really like the way it came out. I then sprayed on a neutral gray. You can notice the tone color difference.
Depending on how bad the white applies I may need to add another layer of shading, but I am highly suspicious that flat black versus flat white is NOT a fight I want to pick, so I may go with a subtle shading effect.
The head has a nasty seam line on top and in front of the V-fin. Took care of that and puddy'd the top of the head. Waiting for it all to dry so I can go sand it later. Also puddy'd any other stuff that needed it. Shoulder units had some bad seam lines which are now taken care of.


Subscribe to:
Posts (Atom)